What’s the difference between the IKEA Backa and Backamo?

If you’re wondering if your Backa 2.5 seater sofa covers can fit your Backamo 3 seater or vice versa, then you’re at the right place.

Alternatively if you just want to know what’s the difference between a Backa 2.5 seater and a Backamo 3 seater because they look so damn similar, we’ll be able to tell you everything you need to know in this one blogpost.

Backamo 3 seater and Backa 2.5 seater differences

Both models have been discontinued for quite some time already, so you won’t be able get replacement slipcovers from IKEA anymore but you can definitely get them from us here:

*Note: Our Backa 2.5 sofa covers are made with pleated skirts like the Backamo 3 seater by default as we think it just looks more sophisticated overall – it’s still no problem if you wish to flaunt your sofa’s legs, just drop us a note and we’ll do it for you :)

Our Customer’s transformed Backa 2.5 seater

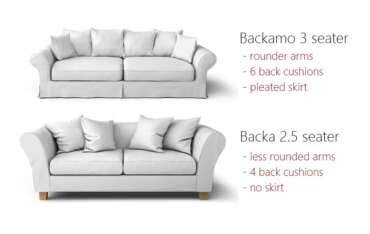
At a quick glance, the Backamo 3 seater and Backa 2.5 seater are very similar in shape and size with their rounded arms, straight back and throw pillows functioning as back pillows. As you can see from the above image comparison though, the Backamo can be easily differentiated by its original slipcover that comes with pleated skirting. The Backa on the other hand, has no skirt nor pleats to begin with.

Our Customer’s transformed Backamo 3 seater

Sofa Dimensions and Measurements

The Backamo 3 seater (as the name implies) is slightly larger than the Backa 2.5 seater despite the slight illusion given from the above 3D images.

The Backamo 3 seater measures at an overall:
– Width: 212cm x Depth: 94cm x Height: 73cm, while;

The Backa measures in at an overall:
– Width: 196cm x Depth: 94cm x Height: 73cm.

Another easy mode of reference would be to check out the seat cushion measurements:

  • Backamo 3 sofa seat cushion dimensions: 83 x 72 x 16cm
  • Backa 2.5 sofa seat cushion dimensions: 76 x 79 x 14cm

So to answer the question, “Can a Backamo 3 seater slipcover fit a Backa 2.5 seater sofa cover and vice versa?”

The short answer is no – see image reference below.

Backamo 3 seater covers on a Backa 2.5 sofa

The result would be as expected, the entire sofa cover would be a good 15cm or so wider and the seat cushions would be somewhat loose or awkward fitting. Not to mention, you’ll be missing (or gaining) an extra 2 back pillow covers should you ever get the wrong model.

Once again, if you ever need help identifying a sofa – do shoot us a photo at info@comfortworks.com.au and we’ll always try to help you out, pinky promise!

4 different tufting styles for your sofa

Let’s all step into the time machine and get retrofied! Back in the 1960s, almost everyone had a tufted sofa or dreamt of owning one, especially in leather. Until today, tufted sofas is still being treated as a classy furniture piece and nothing screams “mid-century modern” louder than a nifty tufted sofa in your living room.

Typically a tufted sofa comes with a huge price tag, so if buying a new tufted sofa is not in your budget, you can still own a tufted sofa. How? Well, all you need is a sofa and a DIY tufting kit.

Armed with a DIY tufting, here are 4 different tufting styles that you can consider:

1. Biscuit Button Tufting

Pretty straightforward name – these tufting forms square shaped folds and results in a giant comfy biscuit. In order to make these folds, the placing of the tufting buttons are very important – it should be consistent and straight for the effect to come alive.

Before you start, you will have to identify your sofa type first:

i. Removable cushions

If you have removable cushions like the Karlstad sofa from IKEA, tufting is even easier as there are many tutorials on how to do it.  We were particularly ecstatic when Michelle decided to use our DIY tufting kit and wrote a tutorial on how she tufted her Karlstad.

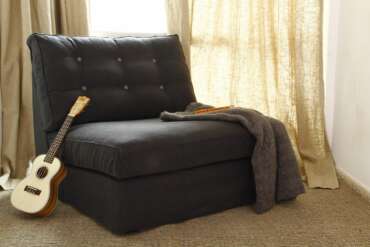
It was actually easier than we thought when we did the prototyping, took quite a while though! We didn’t have a Karlstad available, so we experimented on our Kivik instead. Check out the photo below on how it turned out!

Tip: Unzip the cushion cover as you pass the needle through the cushion so that you can guide it perfectly through the back side of the cushion cover.

ii. Non-removable cushions

If your sofa does not have removable cushions, it gets a bit more tricky as when you’re ready to tuft, you have to drill small holes in the sofa frame in order for the threads to go through the sofa. Once you drill the holes, the steps are the same but it might be harder to manoeuvre the sofa/chair than a cushion during the process.

Check out the full project/tutorial for the tufted Jennylund armchair by Maria Confer over at her blog. We were blown away by how amazing it turned out!

We’ve also stumbled upon this how to do button tufting video tutorial that shows a step-by-step on how to tie an upholstery slipknot.

2. Diamond Button Tufting

Diamond button tufting would be something you see very often on an upholstered leather couch. It’s similar to the biscuit tufting but the buttons are placed at an interval to create the diamond shape effect. This style looks amazing on leather sofas. Don’t fret if you don’t have a leather sofa, you can get bycast leather sofa covers as well, they’re more affordable.

i. Removable cushions

Follow this tutorial from Honey Badger Home, on her adventure of how she tufted her Karlstad in Modena Black, but instead of the biscuit pattern, follow the diamond pattern like the picture below.

ii. Non-removable cushions

If your sofa doesn’t have removable cushions, you’d need to drill small holes through your sofa frame to allow the tufting thread to go through the back of the sofa. The process is pretty much the same as above, but instead of following her biscuit pattern, we’re just using the diamond pattern.

3. Single Line Button Tufting

If you’re a fan of Mad Men, you’ve probably seen Don Draper hosting parties in his nifty apartment in Season 5. Don Draper welcomes his guest to the living room with the sleek corner lounge with a single line tufting that exudes the 1960s classiness.

This pattern requires less buttons and less work compared to the previous 2 styles. The key is having proportional spacings above and below the line tufting, making sure the tufting line is strategically in the middle of the cushions.

Tip: Get another person to look at the tufting pattern, they might be able to point out if the pattern is not consistent.

4. Buttonless Tufting

The previous 3 styles would require you to get buttons for the tufting, but for this style, you can save your buttons for another day. As the name explains itself, you don’t have use actual buttons for the tufting – perfect when you can’t find buttons that you like or if you don’t want to use buttons in the first place.

So what do you use? This is where it gets interesting – by using the embroidery thread and bundling them into a button.

For a step-by-step tutorial, head on Brooke’s blog on how to do a buttonless tufting. This style is suitable if your cushions are saggy and the stuffings don’t stay in shape, because the tufting actually help the stuffings hold up and not sag as much. You can see the before and after photos on her blogpost, the transformation was amazing!

As the thread buttons are not as huge and heavy as an actual button, you get a more subtle effect in comparison with the typical button tufting.

TIP: Constantly check on how the tufting look at the sofa during the process. Gravity might pull the cushion and the tufting downwards and making the patterns inconsistent.

Pros & Cons

The best thing about having DIY tufting is that they can be removed easily. So over time if you do become bored of your tufted couch – just cut the threads loose and they’re as good as before.

You are free to customise the tufting based on your own preference. What we’ve shown above are just a few options that you can try, but let’s just say the sky is the limit. For example, you can have mixed buttons, unique asymmetrical patterns, etc.

The downside of DIY tufting is that you’ll lose the ability to change your slipcovers. In order to remove the slipcovers, you’ll have to cut the tufting threads and re-do the tufting if you still want them. So, I wouldn’t recommend tufting your couch if you’re planning to wash your slipcovers often.

Your DIY tufting might not be as sturdy as an upholstered tufting – re-upholsterers actually screw tufting to the base to secure them into place.

For those interested, you can get a DIY tufting kit by Comfort Works or read more on a few more of our tufting adventures with our customers.

Already tufted your couch? Tell us how it went! :D

Happy weekend,
Becky

Photo credits:
Don Draper’s Apartment – http://latimesblogs.latimes.com/
Tufted Jennylund – http://www.hickoryandjuniper.com/
Black tufted sofa – http://em.elledecoration.se/
Dansk Couch by Mezzanine – http://www.elusivemagazine.com/dansk-couch-by-mezzanine/
Bright contrast tufting – http://adelightfulblog.blogspot.com
Buttonless tufting – http://inside-outdesign.blogspot.com/
Seams, stitches and piping – Subtle slipcover details

Many of our customers have been requesting more custom details such as contrast piping for their IKEA slipcover, and we find this very endearing as it seems that people do like the advice we hand out. J

A custom slipcover is not personalised until you’re able to add on what is uniquely “you”. Seams, stitches and piping will make your sofa ‘pop’. So don’t be afraid to explore the endless possibilities of what can be done for your sofa slipcover.

Difference between seam, stitch and piping

These 3 sewing terms may seem quite far apart, but they’re actually very much related to each other.

A seam is essentially a line created when 2 pieces of fabrics are sewn (stitched) together. There are actually different ways to create these seams, and piping is essentially the result of one of these seam types.

Types of Decorative Seams (and Stitching)

For starters, there are arguably 4 types of seams:

1. Plain Seams

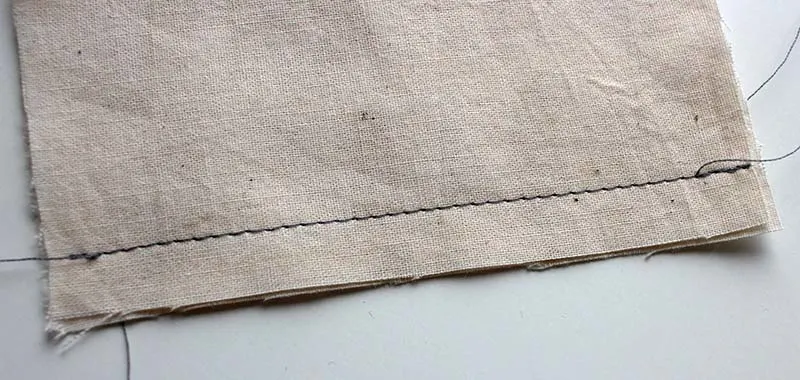
The most common type of machine-sewn seam; basically 2 pieces of fabric (wrong side out) will be stitched along the dotted line as shown below:

Plain seam
Image credit: Sew Guide

So what typically happens let’s say for a square cushion cover, is that all 4 sides will be stitched in that way (1 side with zipper of course) and once all’s done – it gets inverted/flipped to look something like this:

Image credit: Comfort Works

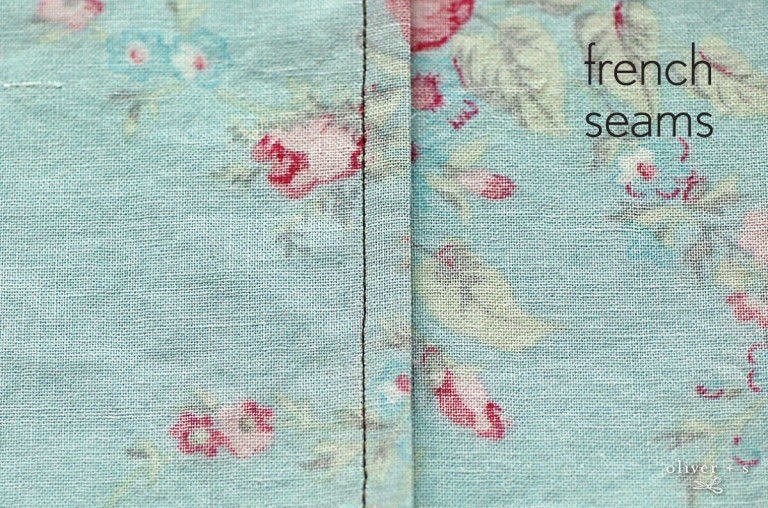
2. French Seams (a.k.a. “Inverted Seams”)

A French seam is kind of like a seam enclosed within another seam (seam-ception!?), and is probably the only seam that is sewn between fabrics with the wrong sides facing each other first.

French seam
Image credit: Oliver + S

The image above does not really do justice for sewing beginners (like myself), so do check out this video tutorial on how to sew a French seam.

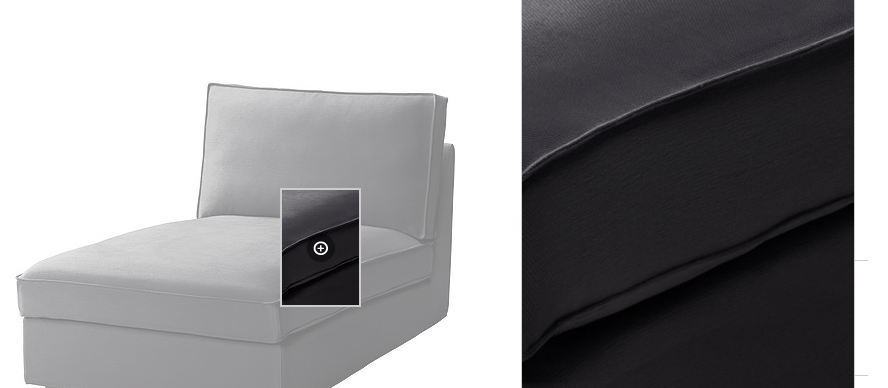
Traditionally, the French seam is just a way to have a clean underside and lessen the chances of unraveling/fraying with the raw edges enclosed. Now, it can be used as a decorative detail for sofas when the entire seam gets inverted – one example would be the IKEA Kivik Sofa.

Kivik inverted seams close up
Image credit: Comfort Works

What used to be on the inside is reversed and flipped onto the outside to create an accent for the sofa – hence the French seam also being known as the “inverted seam”. However, it’s not exactly the most popular sofa feature at the moment and might just be an acquired taste.

3. Flat Seams

This is probably the most straightforward seam type to understand as it’s just intuitively combining 2 fabric pieces together, edge to edge like so:

Image credit: The Creative Curator

And yes, intuitively this would not be the most sturdy type of seam, especially if the fabrics are thin – that’s why this seam is only used for thicker materials or fabrics with selvage. Selvage is basically a stronger fabric that prevents unraveling/fraying.

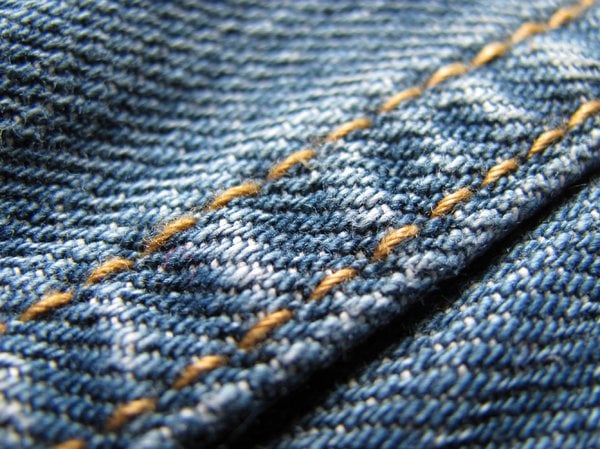
Be sure not to mistake this for “flat-felled” seams – Flat-felled seams are most commonly found on jeans and are similar to the French seam where the raw edges are closed. The main difference (and benefit) is that the final result is completely flat on both sides. Check out the video tutorial here.

Or if you prefer a visual snippet, this image sums it up pretty nicely of how a flat-felled seam is sewn together.

Usually you’ll also be able to see 2 parallel stitchings for the flat-felled seams instead of 1 for the French seam:

Flat Felled Seams on Jeans

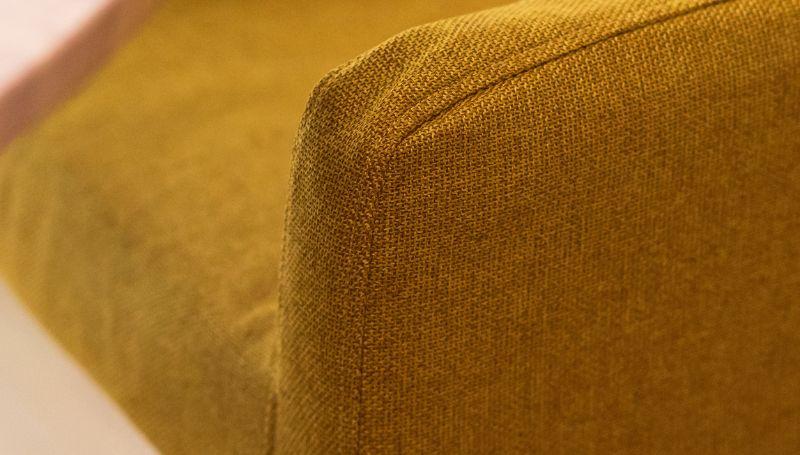
For decorative purposes, the flat-felled seams with double stitching can also give a classic sofa a more modernized and casual look like so:

Image credit: Comfort Works

It’s basically like your sofa wearing jeans – subtle, casual and not too flashy.

4. Lapped Seams

Finally, the lapped seams are used mostly for materials that don’t fray such as fleece, leather, suede, felt, etc. Also pretty straightforward and aptly defined – a lapped seam is created when one fabric goes over another and is top stitched. Because the material doesn’t fray, this single stitch is strong enough to hold the 2 pieces together and eliminates unnecessary bulk.

Aesthetically, it isn’t much to look at unless you do a double stitching – which doesn’t make it too far off from the Flat-felled seam with double stitching. As such, we won’t delve too deep into it here but you can visit this tutorial to get a better understanding here: http://gotosew.com/2013/06/guest-post-lapped-seam-tutorial/.

Piping, Cording and Welting

Okay, this is the part where it might get a little confusing – the words above all mean the same thing to us actually. “Welting” on the other hand, seems to have 2 definitions:

  1. After doing a bit of research online, the welt seam is basically the flat-felled seam
  2. The other meaning is the same as piping and cording

So with piping, cording or welting – these are basically made by combining 2 fabrics like a flat seam (refer to above) BUT, you sew a cord (wrapped around with fabric) in between the other 2 fabrics.

Confused? Check out the entire video tutorial here: https://www.youtube.com/watch?v=_jKFTqI7YKI

Piping and Cording Applications

We’ve seen contrast and standard piping options quite often (if you haven’t, check our contrast piping blogpost out), but there are a couple of other ways to personalise your covers using the same method.

Piping without a Cord inside

Image credit: Comfort Works

Here’s how cordless piping would look like on the entire sofa roughly – yummy? Too much? Let us know!

And there you have it, just a quick lesson on seams, stitching and piping and hopefully some ideas you could use for your upcoming custom slipcover project with us :)

For more ideas and inspiration, follow our Pinterest Board for seams and piping: https://www.pinterest.com/comfortworks/sewing-secrets/

Till next time, have a good one!

Explore custom made slipcovers

Beautify your IKEA sofa with custom long skirt slipcovers

Most of us would have had an IKEA furniture or two at some point in our lives. And at another point, you start to question your taste and ask, “does this look cheap?”

We completely empathize – the older we get, the better our standards and that’s always a good thing. So just because you bought the sofa from IKEA doesn’t mean that it always has to look cheap. Some of us paid good money for IKEA sofas after all! (Think Stockholm Models)

With IKEA furnitures around our office (we should totally get sponsored), we sincerely believe that even your 8 year old Klippan – would have the potential to look amazing without burning a hole in your pocket especially when they’re still structurally sound.

In this blogpost, we’ll be talking about how you can improve the look of your sofa with custom long skirt slipcovers.

Why get long skirt slipcovers?

1. Hide those legs!

One of the things that we didn’t like about the IKEA sofas would be their rectangular birch wooden legs (Karlstad owners, you know what we’re talking about) – not the most appealing set of legs if you ask us.

So we thought the simplest solution to hide the legs would be with the long skirt slipcover, which inadvertently also makes it seem more classy than an upholstered snug fit at times.

Karlstad Long Skirt Slipcovers


2. Practical Solution to Leather and Upholstered Sofas

If you have a leather or a upholstered IKEA sofa, you’ll notice that after a few good years, it will start to show clear signs of wear and tear and you’d be thinking to get them reupholstered or buy a new couch entirely.

The annoying thing is:

  1. Upholstering an IKEA sofa is probably going to be more expensive than the sofa itself
  2. It feels wasteful to dispose the old couch (especially if it’s still sturdy)

Why not get long skirt slipcovers instead?

There’s a good reason why they’re called “slip” covers. They’re super easy to put on as you don’t need to remove your current covers. They slip right over the existing sofa and now you can remove them anytime to get them cleaned up! Instantly it’ll look like a brand new sofa and no one needs to know what’s underneath that slipcover.

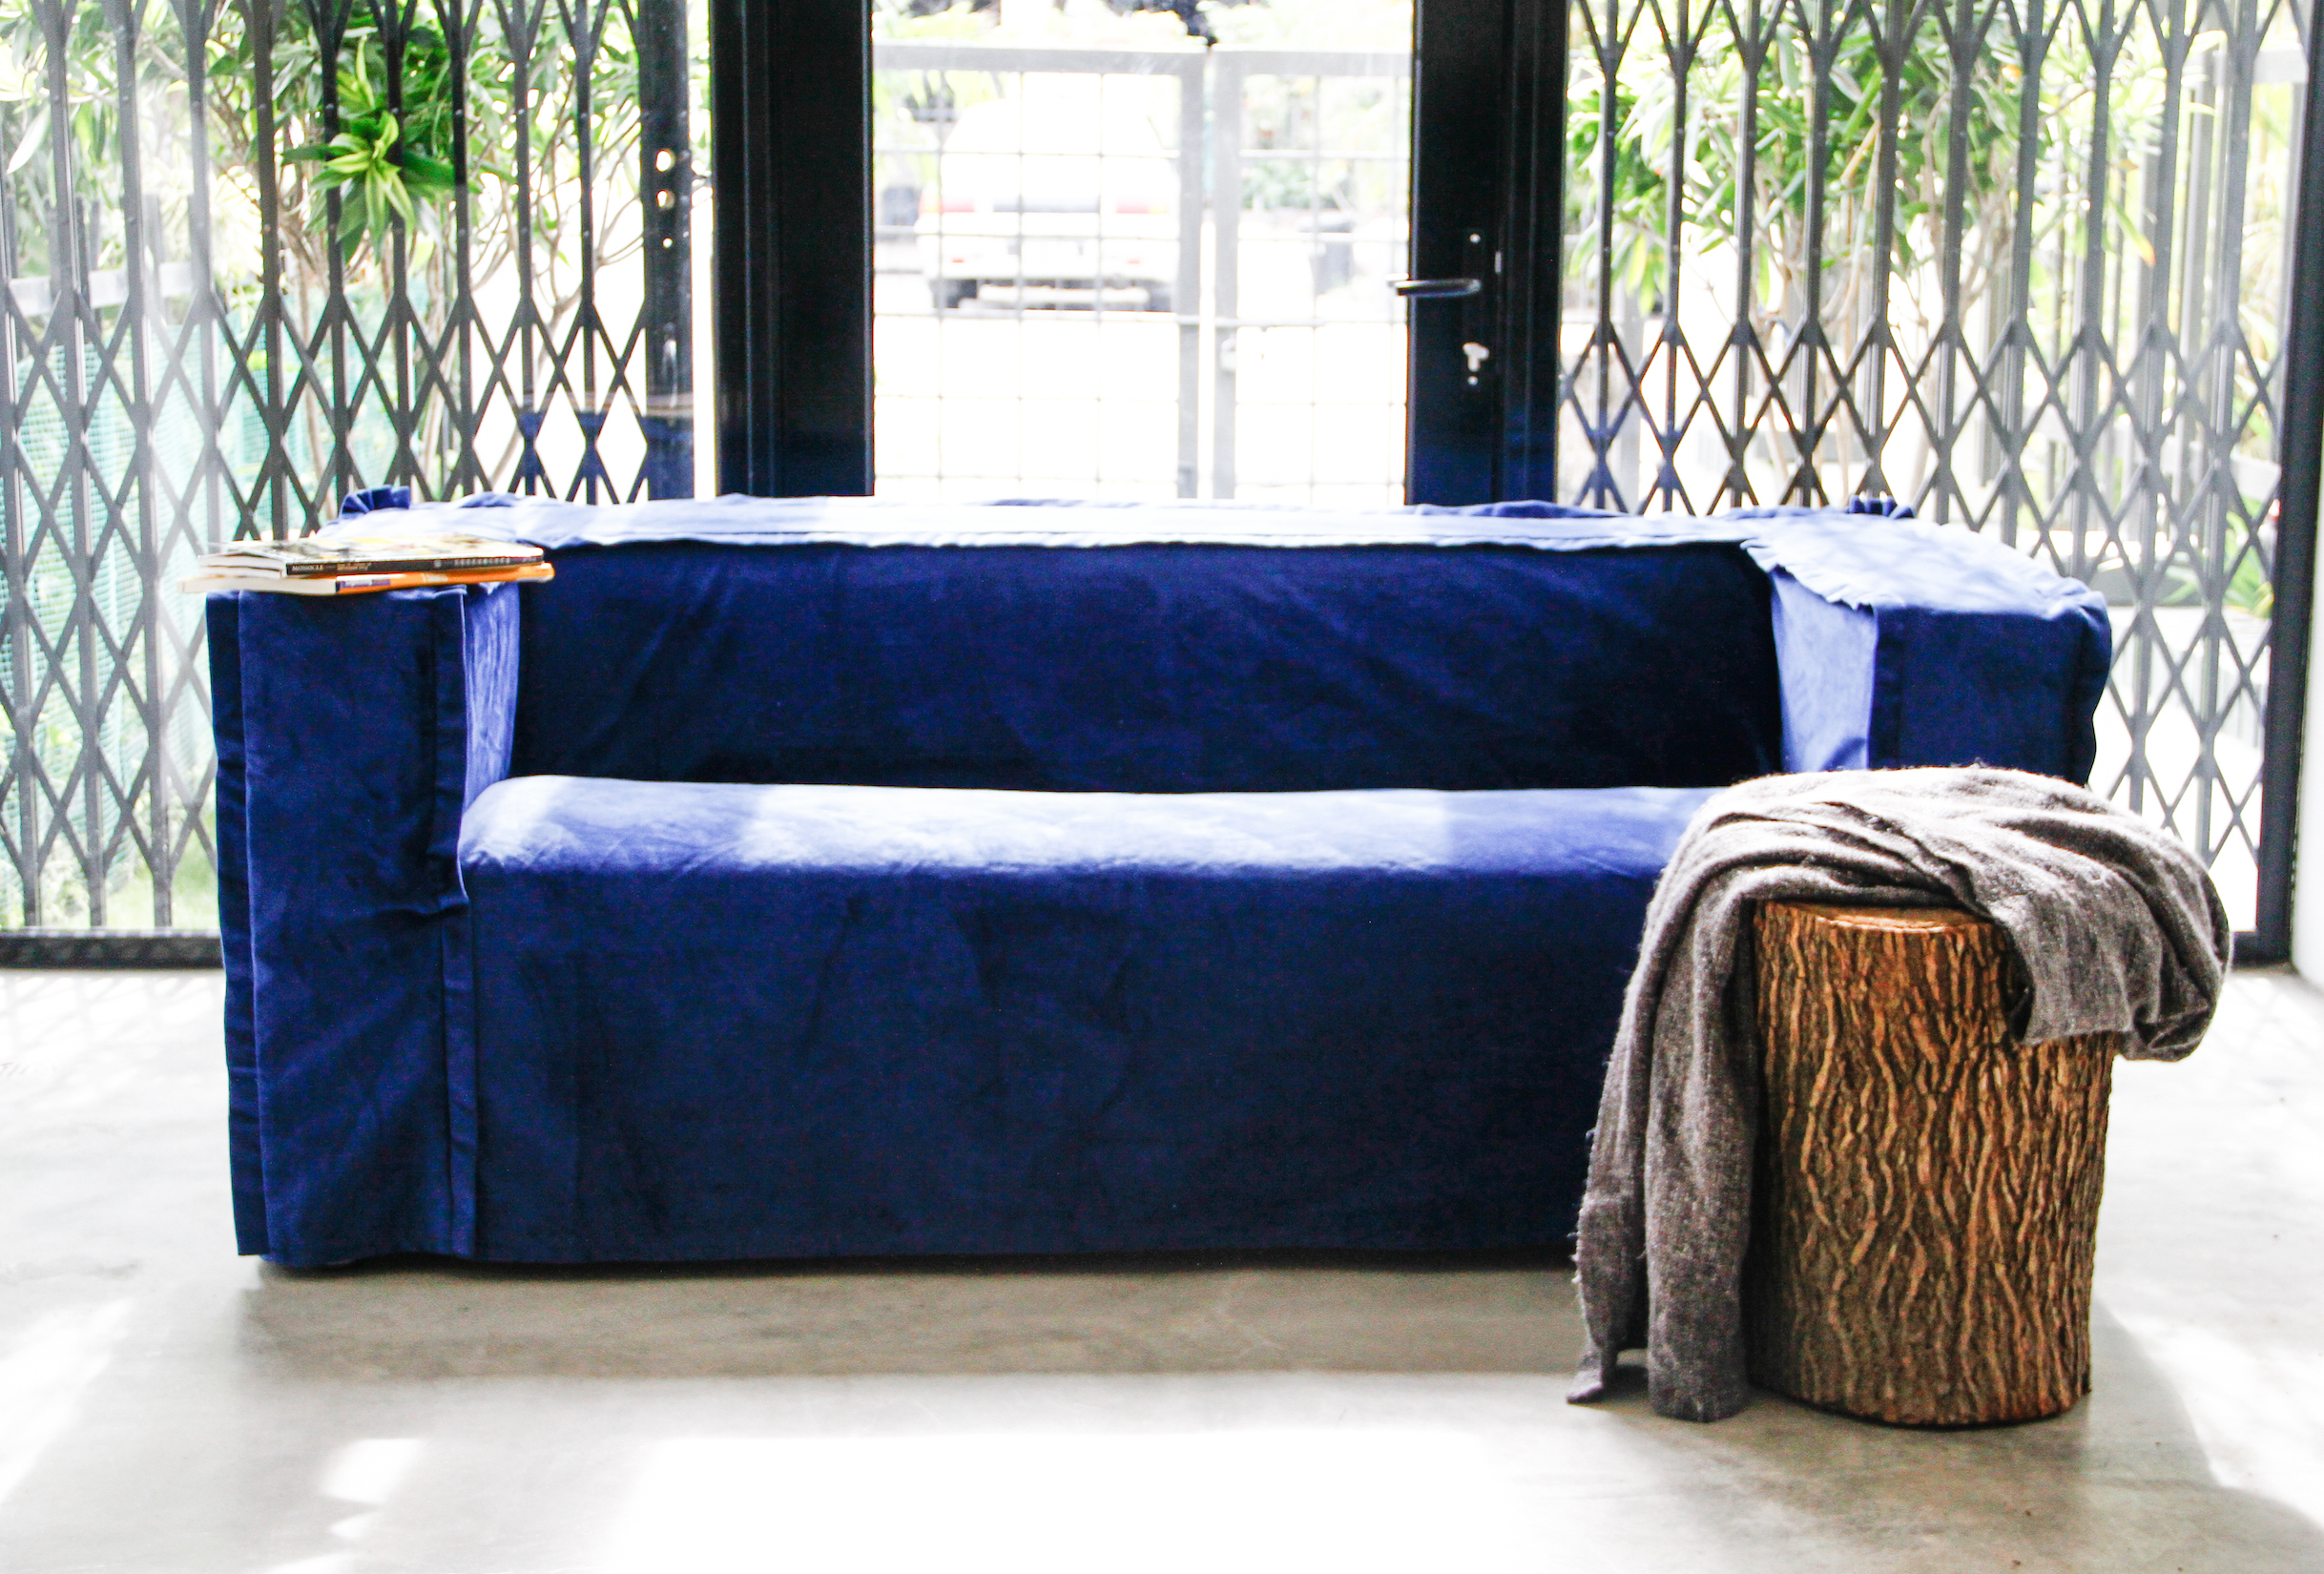
Manstad Sofa Bed in Long Skirt Linen

Different Styles of Long Skirt Slipcovers

1. ‘Shabby-chic’ linen long skirts

In case you guys haven’t noticed, we’re huge fans of the ‘shabby-chic’ style and how it makes the furniture look so effortlessly beautiful and laid back. And usually when we get linen slipcovers, they tend to be very soft and comfortable, so that’s another added bonus!

Shabby Chic Sofa by Rachel Ashwell

Aesthetically, the added wrinkles do give a more textured look and an insurmountable depth to your living space – this is of course, quite an acquired taste and not for everyone.

That’s not all – the same concept could look pretty good in a man cave as well. Go for darker linens and lose the pleats for a more masculine slipcover (think Christian Grey’s home). It’s also quite hard not to like them when they’re so easy to maintain and you don’t even need to iron the covers – who would have thought that wrinkles look so good on a sofa!

Loose Grey Linen Slipcovered Sofa

2. Contrast banding

One fine day, we had a little extra time to play around with this crazy idea which we call contrast banding. Basically it’s sewing 2 fabrics and using the entire piece to create an entirely unique piece. Check out this long skirt Klippan that we did! Do you like it or hate it? All comments welcome!

Klippan Long Skirt With Contrast Banding

3. Cheeky Mid Skirt covers

Fortunately, not all IKEA sofa legs are rectangular and birch wood. If you have sexy legs to show off but still love the idea of a skirt, then go for the mid skirt. You get to show off a bit of leg but still get that elegant look as well.

This style would work very well with dining chairs or with sofas with tall sofa legs.

If you plan on getting custom slipcovers from us, you get to choose the length of your slipcover’s skirt! Along with other customisations such as pleats and piping, but we’ll talk more about next time :)

Till then, happy designing!


Photo credits:

MCM Shabby Chic Linen Sofa – http://mcmhouse.com/
Dining chairs with cheeky Mid Skirt – http://www.moderncountrystyle.blogspot.com

Sofa struggles? We've got you covered.

From pet mishaps to everyday spills, our sofa covers tackle life's little messes effortlessly.

Find the perfect sofa cover
Stuck with a stained sofa?

Stuck with a stained sofa?

Spills happen, but they don't have to stay. Our stain-resistant, machine-washable slipcovers make cleanup effortless.

Find a cover
Need an outdoor-friendly couch cover?

Need an outdoor-friendly couch cover?

Sun, rain, and spills are no match for our UV-protected sofa covers, designed to handle the elements in style.

Upgrade my sofa
Pets love your sofa a little too much?

Pets love your sofa a little too much?

Claws, fur, and accidents won't ruin your space. Our pet-friendly sofa covers are tough, stylish, and easy to clean.

Protect it now
Moving in, but your sofa doesn't fit the space?

Moving in, but your sofa doesn't fit the space?

Update your sofa to match your new home with a sofa cover that changes the style without replacing the frame.

Revive your sofa